DIY vs Professional Pergola Assembly Guide
Table of Contents
- Quick Comparison: DIY vs Professional Pergola Assembly
- Essential Tools for Pergola Assembly
- Average Pergola Installation Time: What to Expect
- Pergola Installation Permit Requirements
- Site Preparation: Grading, Soil, and Foundation Anchoring
- Hidden Risks of DIY: Insurance, Liability, and Resale Value
- Post-Installation Maintenance Schedule
- Choosing the Right Pergola for Your Assembly Plan
- Frequently Asked Questions
Last Updated: September 13, 2026
Quick Comparison: DIY vs Professional Pergola Assembly
The choice between DIY and professional pergola assembly comes down to three factors: your time, your comfort with structural work, and how much risk you can absorb. Most homeowners who tackle a kit themselves spend a full weekend on it; a crew typically takes one to two days.
At Backyard Comfort CO, we ship pergola kits nationwide, and the question we hear most is simple: can I build this myself? Yes, for most able-bodied adults with basic tools. But "can" and "should" are different questions, and the gap between them is where projects go wrong.
Below, we break down the real costs, the tools you'll need, the permits you might overlook, and the risks nobody mentions until after the fact.
Cost Breakdown: DIY vs Hiring a Crew
A DIY pergola build saves on labor but costs weekends, tool rentals, and the occasional redo. Professional installation adds a labor line item but removes the risk of a structural mistake that voids a warranty or fails an inspection.
| Factor | DIY Assembly | Professional Installation |
|---|---|---|
| Labor cost | Your time | Crew rates apply |
| Timeline | One to three weekends | One to two days |
| Tool access | Rented or borrowed | Crew supplies |
| Permit handling | You file and schedule | Often handled for you |
| Error risk | Higher without experience | Lower, insured work |
| Warranty impact | Voids coverage if misinstalled | Preserved |
The trade-off is straightforward: you're paying for certainty. If your schedule is tight or your soil and slope are unusual, that certainty is worth the savings.
Pros and Cons at a Glance
DIY pros: lower upfront cost, full control over timing, and the satisfaction of building something permanent. DIY cons: you own every mistake, and a missed fastener specification or shallow footing can compromise structural integrity.
Professional pros: faster completion, insured work, and someone else handles the permit paperwork. Professional cons: higher cost, scheduling delays, and less control over small design choices.
Essential Tools for Pergola Assembly
Most pergola kits require a core set of tools many homeowners already own, plus a few specialty items worth renting. Planning your tool list before delivery day prevents mid-build hardware store runs.
Tools You Probably Already Own
- Tape measure and framing square
- Cordless drill with driver bits
- Hammer and rubber mallet
- Level (a 4-foot level beats a torpedo level here)
- Adjustable wrenches and socket set
- Safety glasses and work gloves
Specialty Tools Worth Renting
- Post-hole digger or auger for concrete footings
- Circular saw for trimming beams to fit
- Rotary hammer if you're anchoring into masonry
- Laser level for confirming post height across a long span
Tool proficiency matters more than quantity. If you've never mixed concrete or set a post, practice on a small project first. Renting an auger for a day costs far less than repairing a crooked frame.
Average Pergola Installation Time: What to Expect
A standard 10x12 pergola kit takes most DIYers 12 to 20 hours across two or three weekends (homedepot.com). Professional crews finish the same structure in one to two days because they work in sequence with a full team.
Site prep and footing work eat the first weekend. Frame assembly and post-to-beam connection take the second. Canopy or louver installation and cleanup fill the third. If your site needs grading, add another half day.
Weather delays stretch timelines. Concrete needs curing time before you load it, and painting or staining requires dry conditions. Build a buffer into your schedule.
Pergola Installation Permit Requirements
Most jurisdictions require a building permit for a pergola above a certain height or square footage, and many homeowners discover this only after a neighbor complains. Checking zoning regulations before you order saves you from tearing down finished work.
When You Need a Permit
Permits are typically triggered by height, footprint, or attachment to an existing structure. A freestanding pergola under a local height threshold may be exempt, while an attached structure almost always requires review. Rules vary by municipality, so confirm with your local building department before delivery.
A common pattern: a freestanding structure under 30 inches tall and under 200 square feet is exempt in many jurisdictions, while anything attached to the house or over a certain height triggers a full permit. Some jurisdictions also require a separate electrical permit if you add lighting or a fan. The International Residential Code (IRC) provides the model code most states adopt, but local amendments often tighten height, setback, and wind-load requirements (codes.iccsafe.org).
The Permit and Inspection Process
If a permit is required, the process usually follows this sequence:
- Submit a site plan showing the pergola's footprint, setbacks, and footing details.
- Pay the application fee and wait for review, which can take anywhere from a few days to several weeks.
- Receive the approved permit and any conditions, such as required inspections.
- Schedule a footing inspection before pouring concrete, if required.
- Schedule a final inspection after the frame is complete.
Skipping the inspection stage is a common DIY mistake. An unpermitted structure can be flagged during a home sale, and the buyer's lender may require it to be permitted or removed before closing.
Zoning and HOA Rules to Check First
- Setback requirements from property lines
- Maximum height and footprint limits
- HOA architectural approval and color restrictions
- Easement or utility line restrictions
- Wind-load and snow-load requirements for your region
HOA approval often runs on a separate timeline from the municipal permit, and some HOAs require approval before you even apply. Start both processes early.
The cheapest permit is the one you file before you build. Retrofitting compliance after installation costs far more than the original application.
Unique Angle: Permit Status and Insurance
Most guides stop at "get a permit." What they miss is that an unpermitted structure can void your homeowner's insurance coverage for wind or storm damage tied to it. If a claim adjuster finds the pergola was never permitted or inspected, the claim may be denied entirely. Professional installers typically pull the permit as part of the job, one of the less obvious reasons their bid is higher. If you go DIY, treat the permit as non-negotiable.
Site Preparation: Grading, Soil, and Foundation Anchoring
Proper site preparation determines whether your pergola stays square and stable for decades. Grading and leveling come first, then footing placement, then anchoring.
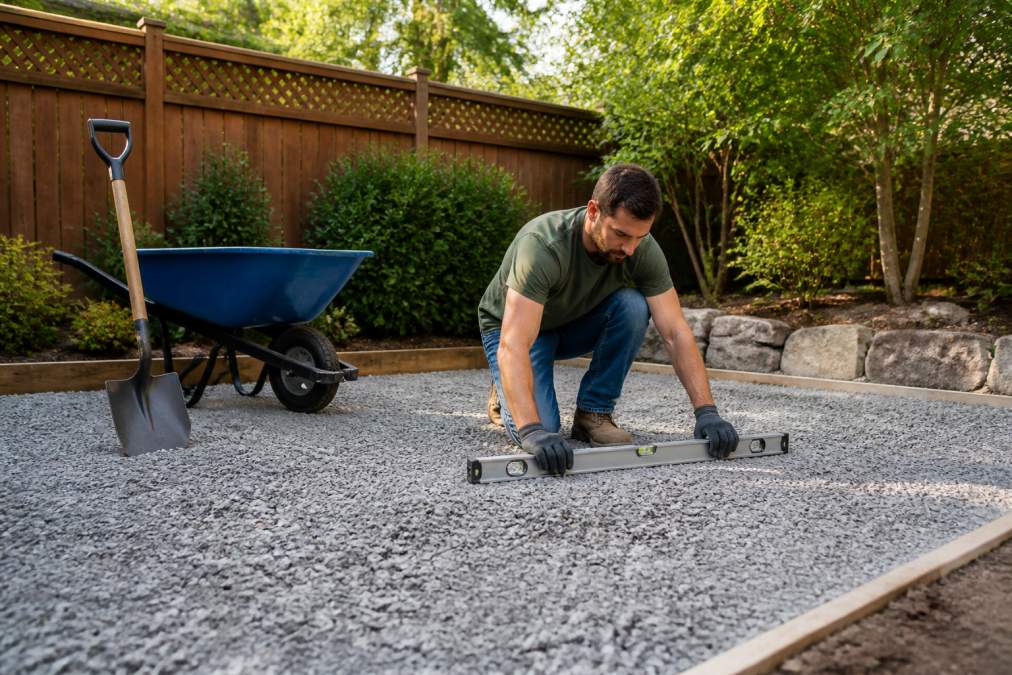
Start by marking your footprint and checking slope. A surface that looks flat often drops several inches across a 12-foot span. Regrade or build up low spots before setting posts.
Soil type affects footing depth. Sandy or loose soil needs wider, deeper concrete footings than compacted clay. If you're unsure, a local extension office can help you read a soil map for your area.
Foundation anchoring options include:
- Cast-in-place concrete footings with embedded post bases
- Expansion bolts into an existing concrete slab
- Ground screws for lighter structures in stable soil
Post-to-beam connection hardware should match the load-bearing capacity of your design. Use the fasteners specified in your kit's assembly guide. Substituting hardware is one of the most common causes of structural failure.
Hidden Risks of DIY: Insurance, Liability, and Resale Value
The risks of a DIY pergola rarely show up on build day. They surface during a storm, an insurance claim, or a home sale, and by then the fix is expensive. Here is what actually happens.
Insurance and Liability Implications
Homeowner's insurance may deny a claim tied to a structure that wasn't permitted or was installed to a non-compliant standard. Most policies cover "other structures," but coverage can be conditioned on the structure being built to code. If an adjuster finds the pergola was never permitted or inspected, the claim may be denied or reduced.
Liability works the same way. If a poorly anchored pergola damages a neighbor's property in high wind, liability can fall on you. Most homeowner's policies include personal liability coverage, but an unpermitted or non-compliant structure can trigger an exclusion. Professional installation typically includes insured work, which shifts that exposure to the contractor's policy during the build and, in some cases, after.
A practical step: call your insurance agent before you build and ask two questions. First, does the policy cover a detached structure of this size and type? Second, does the policy require the structure to be permitted and inspected? Get the answer in writing.
Resale Value Impact
A well-built pergola adds curb appeal and usable outdoor living space, both of which buyers notice. A crooked, unpermitted, or visibly DIY structure does the opposite. During inspection, unpermitted additions frequently become negotiating points or require removal before closing.
Appraisers generally do not assign separate value to a pergola the way they do a finished room, but it can contribute to "curb appeal" and "functional utility" adjustments in an appraisal report (appraisalinstitute.org). The bigger risk is the inspection stage: a home inspector who flags an unpermitted structure can stall the sale, and the buyer's lender may require proof of permit or removal before funding.
What Professional Installation Actually Shifts
Hiring a crew does not just buy speed. It shifts three specific risks:
- Code compliance risk: the contractor pulls the permit and schedules inspections.
- Liability risk during the build: the contractor's insurance covers injuries and property damage.
- Workmanship risk: most contractors warranty their labor for a defined period, separate from the manufacturer's warranty on the kit.
If you go DIY, you absorb all three. That is not a reason to avoid DIY, but it is a reason to price the risk honestly before you decide.
Skipping the permit doesn't just risk a fine. It can stall a home sale, complicate insurance, and leave you liable for damage the structure causes.
A Decision Framework
Ask yourself three questions before you choose DIY:
- Can I get the permit approved and pass inspection on my own timeline?
- Is my site simple enough that a footing mistake is unlikely?
- Am I comfortable absorbing the liability if something fails?
If you answer no to any of these, professional installation is the lower-risk path, even at a higher upfront cost.
Post-Installation Maintenance Schedule
Maintenance requirements depend on your material. Vinyl pergolas need an occasional wash with mild soap and water. Wood pergolas need periodic inspection, tightening, and refinishing to hold up against weather.
| Interval | Task | Material |
|---|---|---|
| Monthly | Check fasteners and connections | All types |
| Seasonal | Inspect for rot, cracks, or rust | Wood, metal |
| Annually | Clean canopy or louver surfaces | All types |
| Every 2-3 years | Refinish or seal | Wood |
| After storms | Inspect anchoring and frame | All types |
Vinyl and aluminum frames cut maintenance to a minimum, which is why they're popular in humid or coastal climates. Wood rewards you with warmth and character, but it asks for attention in return. Match the material to how much upkeep you'll actually do.
Choosing the Right Pergola for Your Assembly Plan
The best pergola for DIY assembly is a kit engineered for straightforward installation, with clear instructions and hardware matched to the frame. If you're hiring out, you have more freedom to choose based on design and material rather than ease of build.
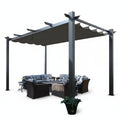
Backyard Comfort CO carries several options suited to different assembly plans. The 144"L X 144"W X 106"H Vinyl Monterey Canopy Pergola is a DIY kit built for simple installation, made from weather-resistant vinyl with an adjustable shade canopy. The slightly smaller 120"L X 120"W X 108"H Vinyl Malibu Canopy Pergola offers the same maintenance-free construction in a tighter footprint.


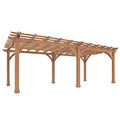
For a hardtop option, the 10' X 12' Louvered Pergola uses an aluminum frame with adjustable louvers and an integrated gutter system. If you want a larger footprint with curtains and netting, the 12' X 20' Louvered Pergola covers more ground. And for a natural wood look, the 12' X 24' Wood Pergola delivers a classic silhouette for larger patios and entertaining spaces.

Match the structure to your site, your climate, and your willingness to maintain it. Then decide who builds it.
Frequently Asked Questions
Is it cheaper to build your own pergola or buy a kit?
A kit usually costs less than building from raw lumber because the manufacturer pre-cuts, pre-drills, and bundles all structural hardware. With a kit, you skip the material markup and waste that comes from buying individual boards. Labor is the real variable: DIY assembly saves the cost of hiring a crew, but you supply the time and tools. For most homeowners, a kit plus DIY assembly is the lowest total cost, while custom fabrication plus professional installation is the highest.
How long does it typically take to assemble a professional-grade pergola kit?
Most two-person DIY teams finish a standard 10x12 or 12x12 kit in one to two weekends, roughly 12 to 20 hours total. Larger units like a 12x20 with curtains and netting can take 25 to 35 hours. Professional crews who install these regularly often complete the same job in one day because they already know the sequence and have the right tools on the truck. The average pergola installation time depends heavily on foundation prep and whether you need to pour concrete footings.
Do I need a building permit for a backyard pergola?
It depends on your local building codes and zoning regulations. Many jurisdictions require a permit for any structure over a certain height or square footage, or for anything attached to the house. Freestanding kits under a threshold, often around 100 to 120 square feet and under 8 feet tall, may be exempt. Always call your local building department before digging. Also check HOA rules, which can be stricter than the city. Skipping a required permit can force removal later and complicate resale.
What tools are essential for a successful DIY pergola installation?
You need a cordless drill with driver bits, a socket set that matches the structural hardware, a 4-foot level, a tape measure, a rubber mallet, and a ladder tall enough to reach the top beams safely. For foundation anchoring, add a post-hole digger, a wheelbarrow for mixing concrete, and a shovel for grading and leveling. A second drill battery and a helper make the beam-lifting stages much easier. Specialty items like a laser level or impact driver can be rented rather than bought.
The real challenge isn't picking a pergola. It's deciding whether you want to spend three weekends building one or one day watching someone else do it. Backyard Comfort CO offers DIY-ready kits with weather-resistant construction, free shipping on most orders within the continental U.S., and a 30-day return policy, so you can choose the structure first and the assembly method second. Get started with Backyard Comfort CO and build an outdoor space that holds up season after season.